Silver solder for jewelry making can be easily melted with a gas soldering iron used as a gas torch. The lowest temperature silver solders are easily within the range of a butane gas torch, and the compact soldering iron style format makes a tool that is both portable and convenient as well as compact and easy to use to get the heat exactly where you want it.
Is it easy to solder silver jewelry using a gas soldering iron?
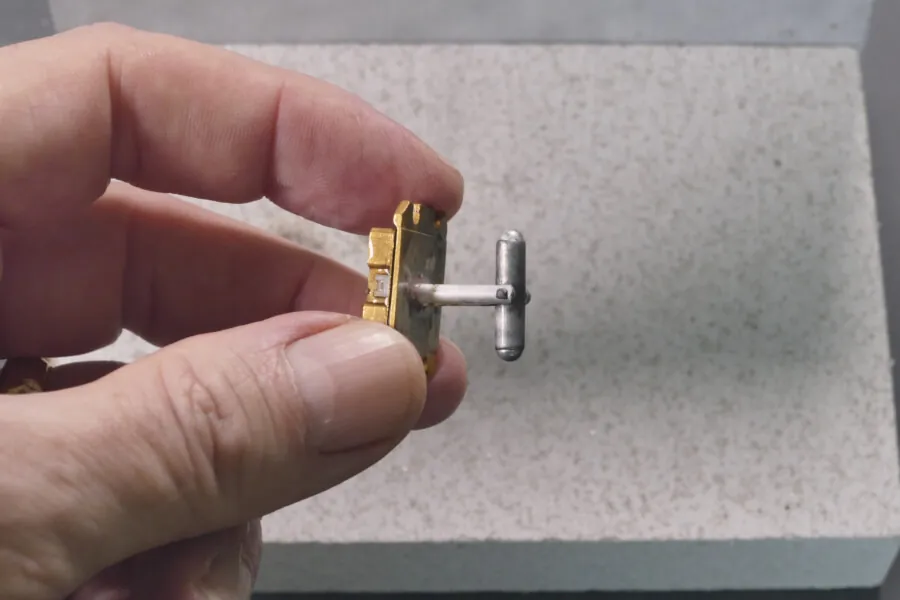
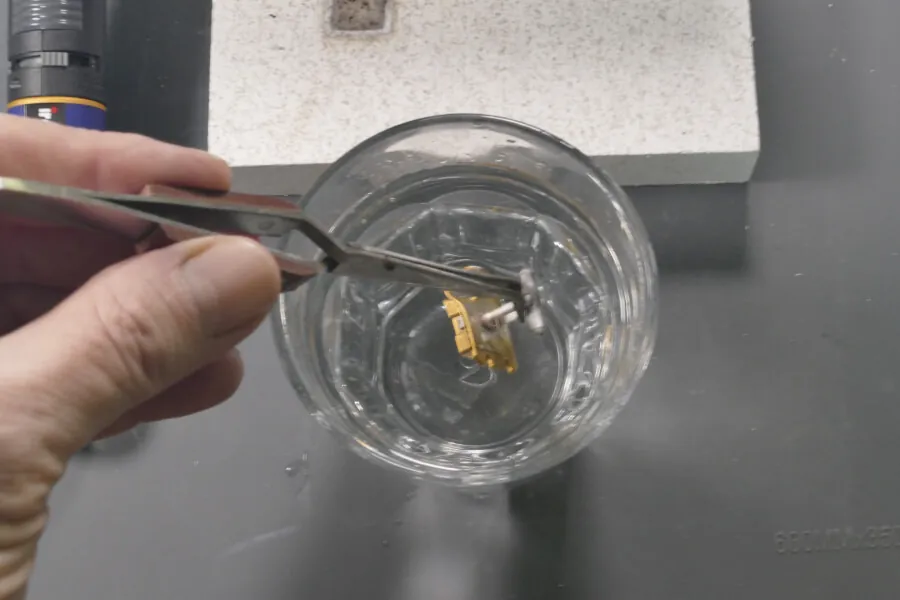
There are in-depth guides to all the different types of jewelry soldering that you can do, we’re going to focus on the basic techniques that are standard for jewelry soldering with gas soldering irons. These techniques apply to all silver jewelry soldering, so once you have the basics you might want to refer to a more comprehensive guide to silver jewelry soldering for your specific project requirements. For a simple project, like making a cufflink as shown in the picture above, the procedure is not complicated.
What are the steps for jewelry soldering with a gas soldering iron?
At first glance it looks like there are a lot of steps even for basic jewelry soldering with a gas soldering iron, but many of the steps are simple, such as allowing time for the piece to cool slightly between certain stages, and the main point is that you should follow the sequence of steps to get the best result.
- Make sure the surfaces to be soldered together are clean and close fitting
- Place your project piece on a soldering block and hold in position with tweezers, wire or a vice
- Heat your project to a dull read color to anneal the silver before soldering
- Allow to cool slightly
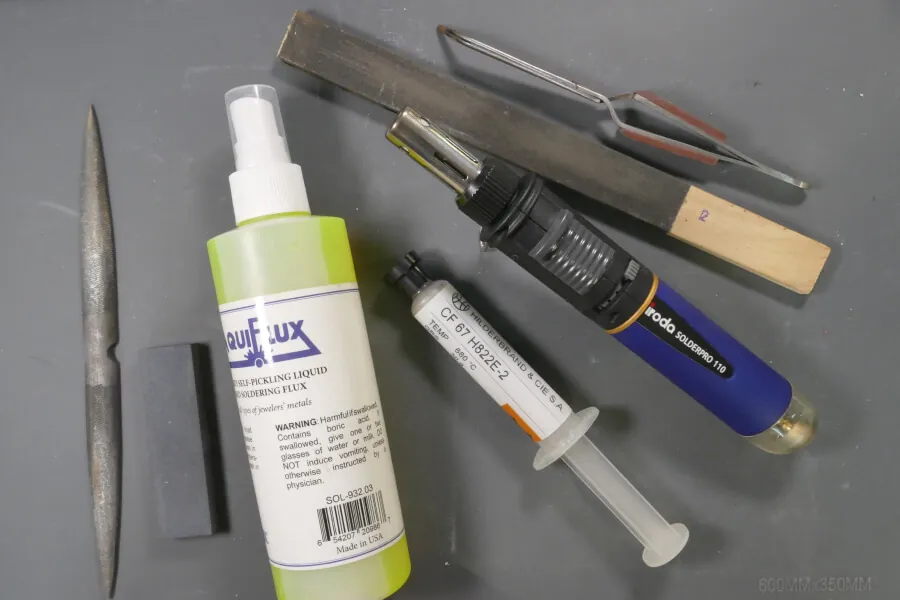
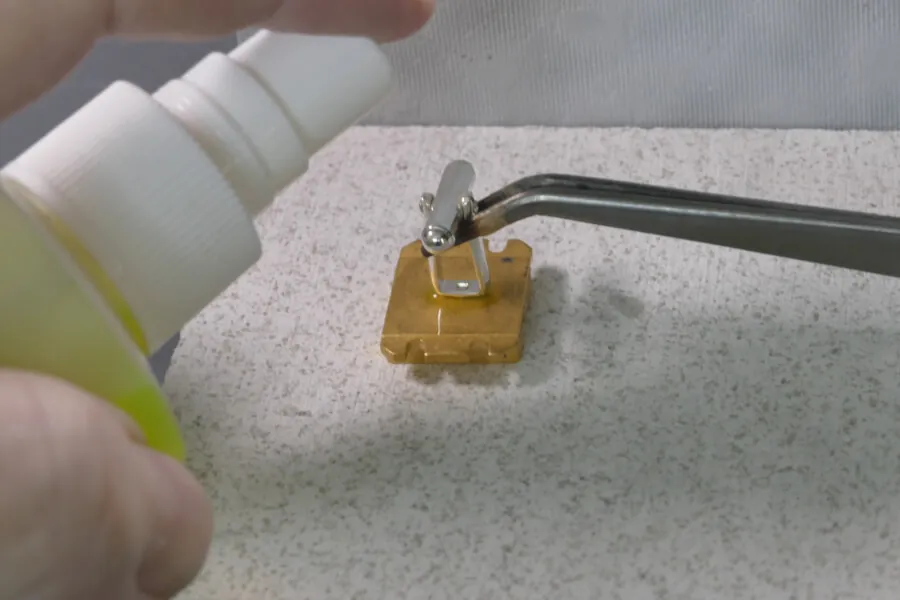
- Paint the area to be joined with borax solution or liquid flux
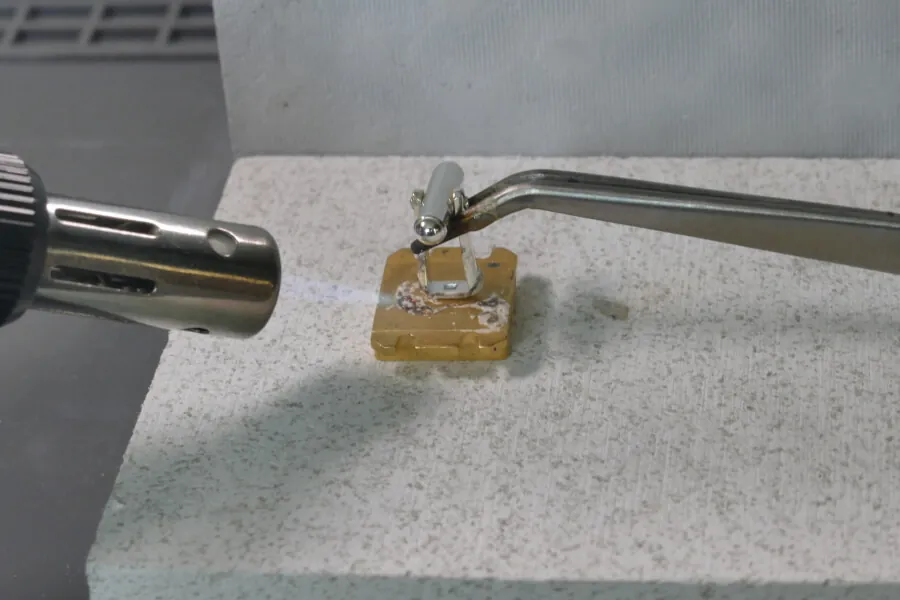
- Apply heat to dry the flux solution
- Allow to cool slightly
- Place cut fragments of silver solder in the gap to be filled using tweezers or a titanium probe
- Apply heat to the jewelry until it glows orange
- Keep heating until the solder melts and fills the gap, you can use a probe to guide the solder
- Remove the heat immediately
- Pick up the soldered jewelry with tweezers and drop it in a water bath to quench it
- Inspect for defects
- Clean off oxides using a pickling solution
- Check for defects and repeat the process if necessary
- Finish with fine emery board, rouge and buffing cloth to get the finish you want
Surfaces need to be clean and close fitting to get the best results when soldering jewelry with gas
The more precise the fit, the better and more invisible your soldered join will be. Close fitting joints with clean surfaces are essential to get the best results. When closing a ring, a valuable technique to achieve this is to over-bend the closure slightly, by bending past the join, and then open it until the faces meet. This technique uses the spring-back of the metal to hold the join together.
If the join for a ring is not clean and close fitting then you can over-bend past the join, clamp the ring in a bench vice and saw through the cross-over point with a fine jewelers saw. This will ensure that the surfaces match. This is a standard ring-making technique, and remember to allow a bit of extra length in the wire to ensure the ring ends up the size you intended after cutting.
Why do you need to heat the entire piece to red and then orange heat with your gas soldering iron?
Initially you need to heat the entire piece of jewelry to red heat with your gas soldering iron to maintain the silver in an annealed state, where the crystalline structure is relaxed. This is ideal for soldering and avoids hard spots in the finished piece. To solder you need to increase the heat past this point to melt the solder. Silver solder comes in grades from soft to hard, depending on the melting temperature, which will be lower than the melting point of high grade silver jewelry.
This is why you need to increase the heat to achieve an orange glow then continue to apply heat until the solder melts and you see it flow into the joint. It is important to stop applying heat at this point, especially if using a hard solder on a lower grade silver jewelry piece, as you may start to melt the whole piece unintentionally if you add too much heat.
How do you finish off your silver jewelry soldering task?
Once the solder has flowed into the joint, you need to remove the heat immediately to avoid overheating your piece, and then use tweezers to drop the entire piece into a quenching bath. The sudden cooling of quenching restores the hard crystalline structure to the annealed silver, which stays soft if you allow it to cool naturally. After quenching, use a pickling solution to remove heat related tarnishing and then finish with your choice of abrasives and buffing cloth to get the results you want.
What is the role of flux in soldering silver jewelry with a gas soldering iron?
You apply flux, which can be a borax solution or a specific liquid flux, to clean the surfaces and also provide some protection against oxidation. The flux ensures the silver solder will flow smoothly when it melts. Without flux there is a tendency for the solder to simply melt into a ball.
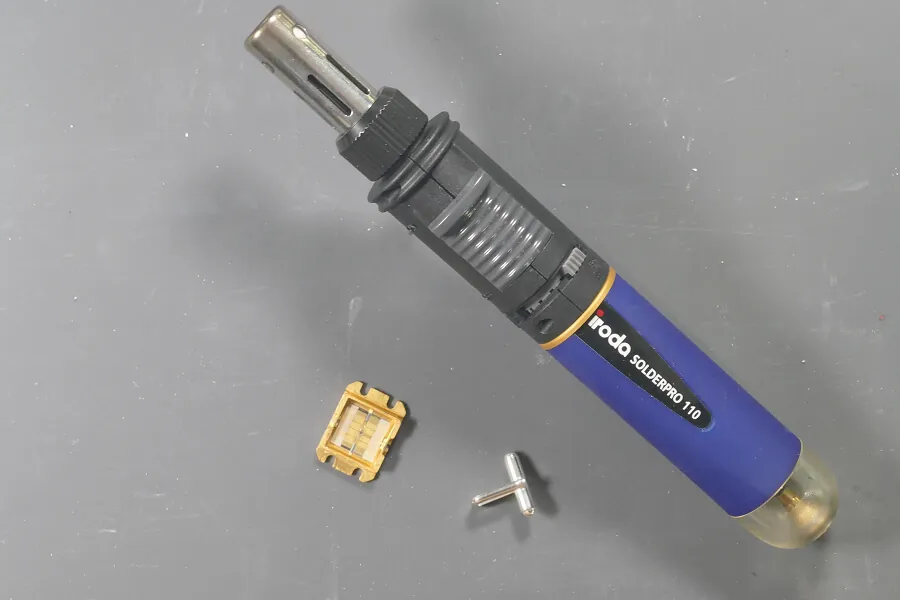
Why are Iroda gas soldering irons good for silver jewelry soldering?
The Iroda SolderPro 110K, shown in the picture above, is a typical Iroda soldering iron that transforms into a gas torch by removing the soldering tip. The compact size and high heat output makes it a very good soldering iron for silver jewelry soldering and enameling as you can easily position the hot tip of the flame where you want it with minimal effort.
With an Iroda compact gas soldering iron working in gas torch mode, it is easy to play the flame over the piece you are working on without fatigue, making Iroda gas soldering irons ideal for multiple sequential soldering tasks. This is especially useful in jewelry soldering if you are making chains or other items of jewelry which require a high level of repetition of individual soldering tasks.