- Butane Soldering Techniques for Beginners in 2025 Iroda Podcast 18:49
Soldering is an essential skill for anyone interested in electronics, DIY repairs, or creating custom projects. Whether you’re fixing a broken headphone cable, assembling an electronic kit, or creating your own circuit board, knowing how to use a butane soldering iron properly will save you time, money, and frustration.
In this comprehensive guide, we’ll focus on the fundamentals of soldering—not “complicated NASA-type soldering”—but the practical techniques that will help beginners gain confidence and achieve professional-looking results. The methods discussed here work with most soldering equipment, including Iroda’s range of high-quality butane soldering irons.
As experts in portable heat tools since 1983, Iroda has been helping DIY enthusiasts and professionals achieve perfect connections with reliable, efficient tools. Learn the right way to solder with part 1 of this helpful guide.
The Essential Tool: Your Butane Soldering Iron
Choosing Your First Soldering Iron
The most important thing to remember when starting your soldering journey is that any butane soldering iron is better than none. While professional-grade tools offer advantages, don’t let the absence of a top-tier soldering iron prevent you from learning this valuable skill.
Iroda offers a range of soldering tools suitable for beginners and professionals alike. Our portable butane soldering irons provide exceptional flexibility for work in any environment, without the constraints of electrical outlets.
Understanding Butane-Powered Soldering Irons
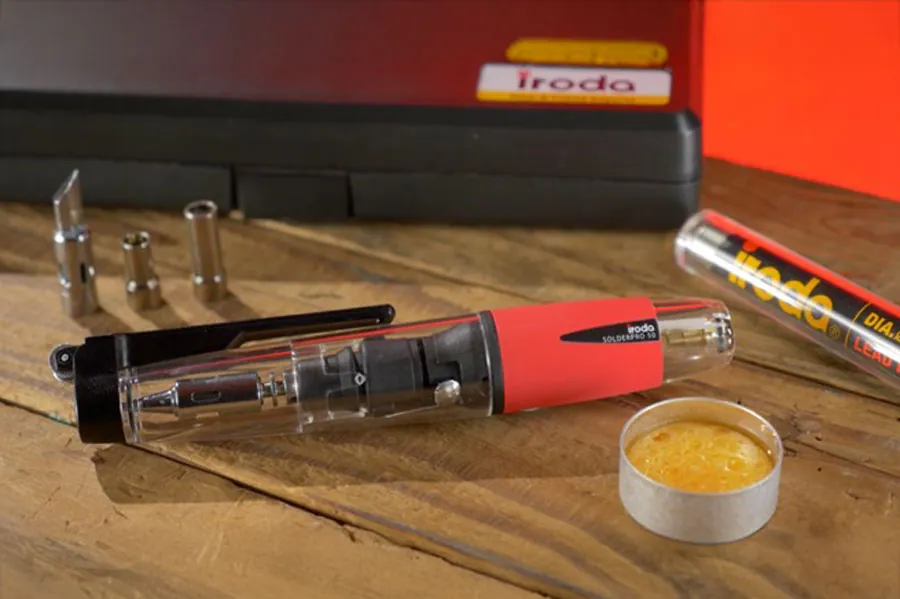
Butane-powered soldering irons, like the Professional Solderpro 110, function similarly to electric models but with some distinct advantages:
| Feature | Benefit |
| Portability | Work anywhere without electrical outlets |
| Quick Heat-Up | Reach operating temperature in seconds |
| Adjustable Temperature | Control heat for different applications |
| Versatility | Multiple tips and attachments available |
| Long Runtime | Up to 75 minutes on a single fill |
One important consideration when using butane soldering irons is awareness of the exhaust port. In well-ventilated areas, this poses no issues, but in confined spaces, be mindful of proper ventilation to ensure safety and comfort.
Heat Output and Control
Different soldering tasks require different heat levels. Here’s a general guide to temperature settings:
- Low Heat (250-300°C): Delicate electronics, surface-mount components
- Medium Heat (300-350°C): General electronics, through-hole components
- High Heat (350-400°C): Larger connections, thicker wires, metal work
The Solderpro 90 offers intuitive temperature control, making it ideal for beginners who need flexibility without complexity.
Understanding Soldering Iron Tips
Most soldering irons, including Iroda’s models, feature interchangeable tips that allow you to adapt your tool to different tasks. Knowing which tip to use can significantly improve your soldering experience and results.
Common Tip Types and Their Applications
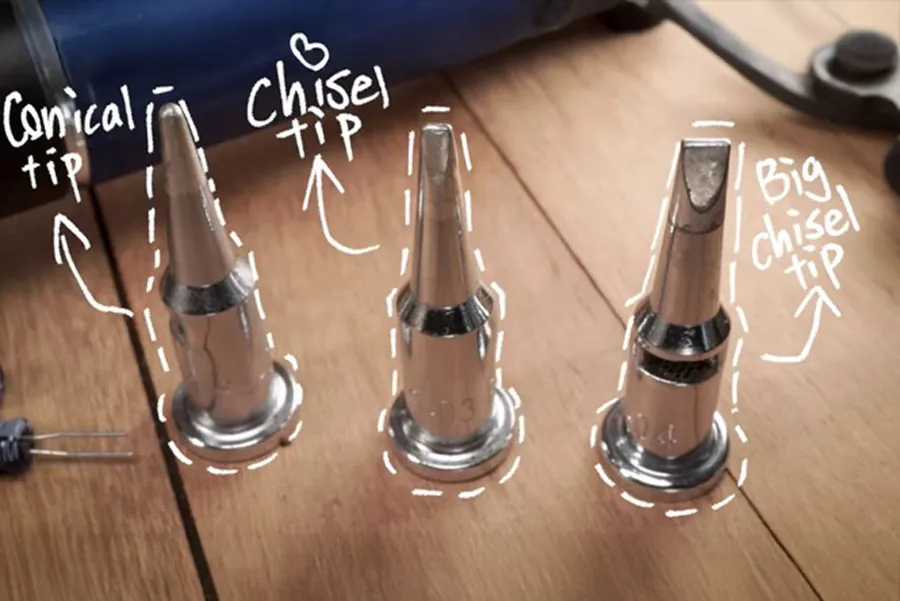
Conical Tips
These pointed tips are excellent for:
- Precision work on circuit boards
- Reaching into tight spaces
- Working with small components
- Surface-mount soldering
Chisel Tips
These flat-ended tips are preferred for:
- Wire connections
- Creating solder bridges
- Drag soldering
- Applications requiring more heat transfer
Specialized Tips
For specific applications, consider:
- Hoof tips for desoldering and removing components
- Knife tips for cutting heat-shrink or scoring
- Micro tips for extremely fine work
The Importance of Tip Mass
The size and mass of your soldering tip directly affect its ability to transfer heat efficiently. Larger tips hold more heat, making them ideal for:
- Thicker gauge wires
- Multiple wire connections
- Ground planes on PCBs
- Metal housings or larger components
For most beginners, a medium chisel tip provides excellent versatility for general electronics work, while a fine conical tip is useful for more detailed circuit board tasks.
Preparing Wires for Soldering
Before applying heat and solder, proper preparation is crucial. The quality of your wire connections depends largely on how well you prepare the materials.
Essential Wire Preparation Tools
Creating professional solder joints begins with the right tools:
| Tool | Purpose | Importance |
| Wire Strippers | Remove insulation without damaging conductors | Essential |
| Wire Cutters | Clean cuts for better connections | Essential |
| Helping Hands | Hold wires in position during soldering | Recommended |
| Flux | Improves solder flow and adhesion | Recommended |
| Cleaning Supplies | Remove oxidation and contaminants | Recommended |
Mastering Wire Stripping Technique
Wire stripping guns are indispensable for achieving consistent, clean results without damaging the conductor. When stripping wires:
- Select the appropriate gauge setting on your stripping tool
- Insert the wire and squeeze firmly
- Pull the tool away to remove insulation
- Leave approximately 3-5mm of insulation near the connection point for strain relief
- Inspect for any nicks or damage to the conductor
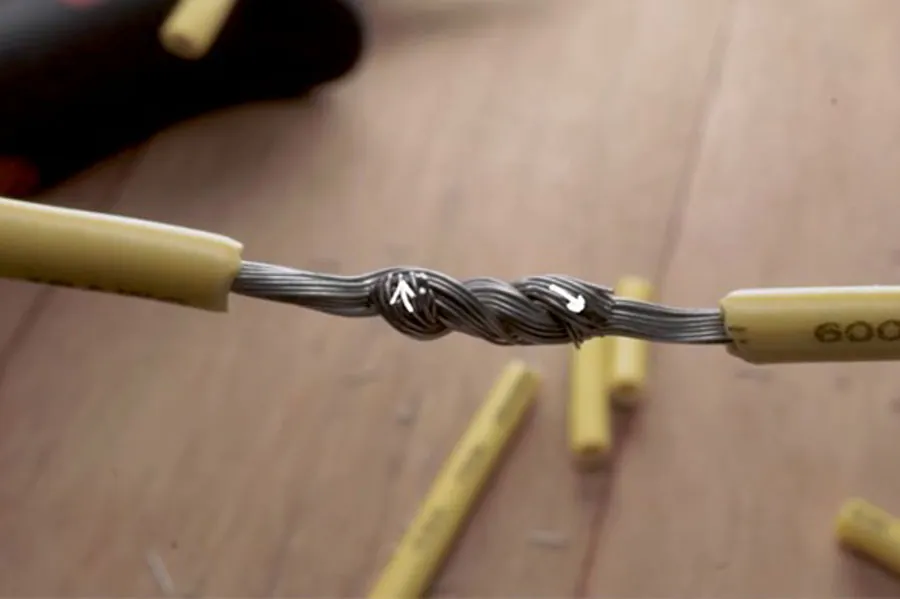
Creating the Perfect Splice
For connecting wires together:
- Strip approximately 12-15mm of insulation from each wire
- Hold wires perpendicular to each other, forming a cross
- Wrap one wire around the other in a tight spiral (3-5 turns)
- Reverse direction and wrap the second wire around the first
- Twist until you achieve a “nice braid” appearance
- Inspect for and fold over any stray strands that might poke through heat shrink
This technique creates a mechanically strong connection even before soldering, which is particularly important for low to medium gauge wires (18-24 AWG).
Preventing Common Wire Preparation Mistakes
- Avoid overstripping – Exposing too much bare wire can lead to shorts
- Check for damaged conductors – Nicked wires have higher resistance and are prone to breaking
- Fold over stray strands – Prevent them from poking through heat shrink and causing shorts
- Clean oxidized wires – Use isopropyl alcohol or specialized cleaner to remove oxidation
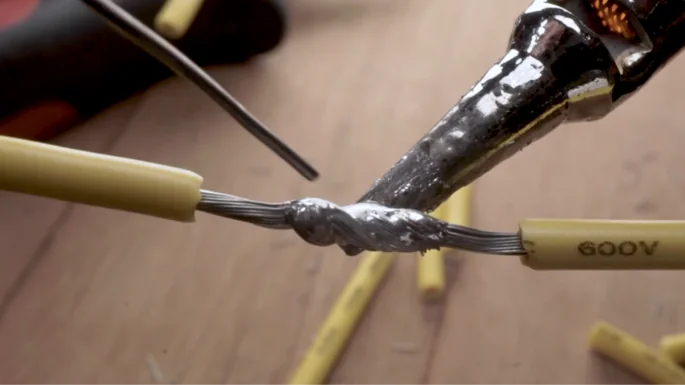
Choosing the Right Solder
The type of solder you use significantly impacts your results. For electronics work, consider these options:
Solder Composition Comparison
| Type | Composition | Melting Point | Best For | Environmental Considerations |
| Lead-Based | 60% Tin, 40% Lead | 183-190°C | General electronics, easier for beginners | Contains lead; handle with care |
| Lead-Free | 99.3% Tin, 0.7% Copper | 217-227°C | RoHS compliant projects, commercial products | Environmentally friendly but requires higher temperatures |
| Silver-Bearing | 96.5% Tin, 3% Silver, 0.5% Copper | 217°C | Fine pitch components, professional work | More expensive but creates stronger joints |
Solder Diameter Selection
- 0.5mm-0.7mm: Fine electronics work, SMD components
- 0.8mm-1.0mm: General electronics, ideal for beginners
- 1.5mm-2.0mm: Larger connections, wire splicing
For most beginners, a 0.8mm 60/40 (tin/lead) rosin-core solder provides an excellent balance of ease of use and versatility.
Preparing Your Workspace
A proper soldering station improves both safety and efficiency:
Essential Workspace Elements
- Well-ventilated area: Solder produces fumes that should not be inhaled
- Heat-resistant surface: Silicone mat or specific soldering mat
- Good lighting: Preferably adjustable task lighting
- Organizational system: Small containers for components and screws
- Fire-safe container: For hot soldering iron when not in use
- Accessible butane: Keep butane jet lighters or refills nearby for butane-powered tools
Safety Considerations
Safety should always be your priority when soldering:
- Keep a small fire extinguisher nearby
- Use safety glasses to protect eyes from solder splashes
- Never touch the metallic parts of the soldering iron
- Allow recently soldered joints to cool before handling
- Store butane refills away from heat sources
- Wash hands after soldering, especially when using lead-based solder
Coming Soon in Part 2
In the next installment of our soldering basics series, we’ll dive into the actual soldering process, covering:
- Step-by-step soldering techniques for different applications
- Common mistakes and how to avoid them
- Properly using heat shrink tubing
- Techniques for soldering thicker wires and components
- Troubleshooting bad solder joints
- Advanced tips to improve your efficiency and results
Stay tuned to learn how to put these preparation techniques into practice and create professional-quality solder joints every time!
About Iroda
Iroda has been manufacturing high-quality portable heat tools since 1983. With a commitment to innovation and reliability, our products are trusted by professionals and DIY enthusiasts worldwide. From our flagship butane soldering irons to specialized heat tools, we provide solutions for every application.
For more information about our products or company history, visit our about iroda page. For assistance with your Iroda tools, our comprehensive product support resources are available to ensure you get the most from your equipment.